At any rate, I discovered very quickly that a tallish 110 lb object is rather tippy when placed on a spindly TV table. It wasn't that the table couldn't support the weight; it was that the rack is so tall it wanted to tip over.
It's always something, isn't it?
After pondering my problem, I decided to make a super sturdy, heavy duty table to support the rack and prevent it from tipping over, and make it at a better (lower) height than the TV table.
Gathered up some hunks of wood and went at it. The pieces here are for the legs and frame.
You'll see that I cannot be confused with a cabinet maker. This is pretty basic and functional.
The main requirement is strength.
Drill some pilot holes for the wood screws that will hold it together.
Along with our very good friend Titebond.
I used about 2/3 of a bottle for this project. Crazy.
I countersunk the pilot holes and then drove the screws in. You can see the glue squeeze-out, which is A Good Thing. I cleaned it up with a damp painter's rag.
Remember the main requirement: strength.
This is the base and legs. I'll put a top on - that's what the rack will sit on.
Looks like an end table at this point. Sort of. If you squint.
Stickley, it is not.
Detail of one leg. The four screws on the legs are #10 and the one on the end holding the side on is a #12.
You can see the countersinks too - might have made them a bit too deep but I'll fill the holes anyway.
It's pretty sturdy. I think this is going to work.
If not, I'll have a small end table for The Dungeon.
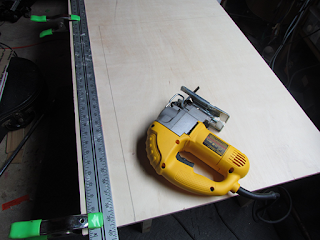
Now to make the top. I used a piece of 1/2 inch birch
Note my homebrew jigsaw guide. The piece of plywood was too large to cut on the bandsaw.
In the interest of strength and support, I decided to put some bracing in on the top.
Drove more screws.
I can't tell you how valuable a drill attachment to drive screws is. No way I could have done this by hand.
Test fit for the top.
In a nod to craftsmanship, I rounded the corners.
It actually looks like a small table. I am stunned.
And...it's quite strong.
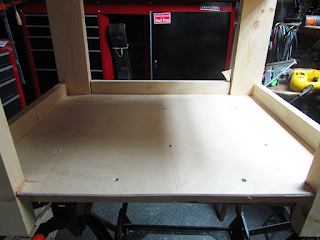
After looking at the almost-finished table/stand, I realized I had some excess space under the top.
So I got a bit crazy and decided to put a shelf on the bottom. Just the thing to store cables, microphones, picks, you name it.
I found a piece of 1/4 inch
The cuts on the corner are so it will fit around the legs. Wild, huh?
Bracing! We need more bracing!
More screws and glue. More strength added to the thing.
You might note that I slipped the shelf into place before I put the braces on.
I flipped it over, and the shelf miraculously fell into position! Screwed and glued it down to the braces.
I put some pieces on three of the sides to act as fences and help keep objects on the shelf. I hate having stuff on low shelves side off onto the floor. And I really hate getting down on my hands and knees to find the stuff that slid off.
I'm thinking about lining the shelf with felt, since I may store semi-delicate stuff on it. Hmmm.
Here's the assembled table. Came out ok.
It's about 18 inches (46cm) tall, 25 inches (about 63cm) wide, and 18 inches deep. It's quite light - just a few pounds I'd guess.
Another angle.
Now I need to fill the countersunk holes, sand it and finish it.


0 comments:
Post a Comment