I wired all the equipment to the patch bay using balanced cable and connectors. I have 3 pieces of gear that are unbalanced, but the recorder and everything else is balanced.
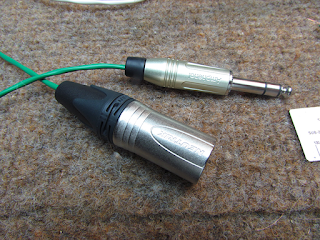
On the right you see one of the dozens of Amphenol TRS plugs I soldered. If I see one of these anytime soon I may scream.
They're a bit fussy to wire - there is a hook on the connector for the shield, which I like, but you have to thread the hot and cold wires through small holes in the lugs for the tip and sleeve connections.
I used Mogami 2944 console cable and I really like it. Easy to strip and tin.
So the process was strip the insulation, twist the stranded wires, tin them, and solder them to the connector.
The vast majority of the connectors were Amphenol TRS's. I would have gotten all Neutriks, which I much prefer, but they cost twice as much. Since I used about 70 or so of them, the Neutriks would have cost about $200 more, so the cost was bit prohibitive. (I can put that $200 toward tools, guitars...something else).
I did use Neutrik XLRs though - I didn't have as many of them so I could justify spending the money. Much easier to work with.
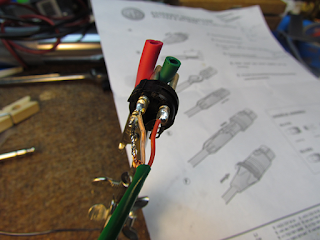
They have a 'cup' that you lay the wire in and solder. And Neutrik has instruction sheets indicating the amount of insulation to strip off the cable for each type of connector. (See a sheet in the background). I can judge 4mm pretty consistently now :-).
The picture above is one of the Neutrik XLR connectors after soldering.
I love those things. Beautifully made and so wonderful to work with.
I didn't keep an exact count of how many connectors I did, but there are 38 plugs in the back of the patch bay - all TRS phone plugs. And most of the other ends are TRS except for about 8 - so that's...hmm....68 TRS plugs plus 8 XLRs just on the patch bay - 76 total.
Then I have about another 20 XLRs running from my mic input panel on the rack to the recorder.
So call it about 100 connectors in round numbers. At 3 lugs each, that's about 300 solder joints.
Not to mention all the solder joints on the two Altec mic preamps I just built. Wow.
It was tedious, so I only worked about an hour a day or so on this project - long enough to have 4 to 6 cables done in one sitting. When I got tired of it, I stopped. I figured I wasn't in a race and I needed to do a thorough job. I certainly don't want to track down bad connections later, after it's all wired. I also tested each cable for continuity as I made them up. So as far as I know, all of this should work :-). (If it doesn't, you'll probably read about it here).
The advantage of doing it yourself is that you can have custom lengths, and use the connectors and wire you want. Mine are all good quality. And they're easily serviced in the unlikely event that something happens. Not easy to do with
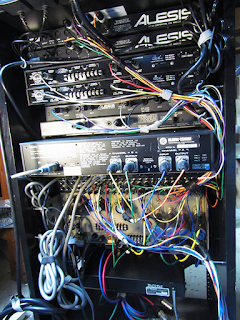
This is a shot of the back of the rack at the start of wiring. Looks like a mess at this stage.
I labelled everything with stick-on numbers on the connectors at each end. I also created a spreadsheet with all of the patch connections listed - with the wire color, the connector code, and if the equipment was unbalanced or balanced.
I figured it might come in handy if I ever start rewiring stuff.
Here's the back side of the patch bay. I used all different color cable to help identify connections down the road.
Did I mention I used a LOT of connectors?
By the way, I get my connectors and wire at Redco Audio. Hands down the best prices, service and shipping.
Here's the finished wiring.
I used velcro wire ties to make harnesses of groups of cables.
You can also see where I used metal hooks on the sides of the rack to hang cable bundles on. For the most part, signal leads are on the right side and AC power leads are on the left.
You can't see it in this picture, but there is a group of a dozen or so cables that will run to the recorder. These are aux sends and inserts/returns from the recorder as well as 5 microphone lines. I put a strip on the front of the rack with female XLR connectors in it so I can just plug mics in there and not have to plug or unplug much from the recorder.
Some of those inputs in the strip connect right to the Altec preamps in the rack. I tried to think ahead and make everything as convenient as I could.
Here's the front of the rack.
This thing is really heavy - I weighed it with my bathroom scale and it's about 110 lbs., or 50 kg! It was brutal getting it up 2 flights of stairs to my 'studio.' If I had to do it again, I'd probably make 2 or 3 smaller units.
The mic panel I metioned is near the bottom under the two green Altecs. You can see the row of XLR female panel plugs there.


0 comments:
Post a Comment