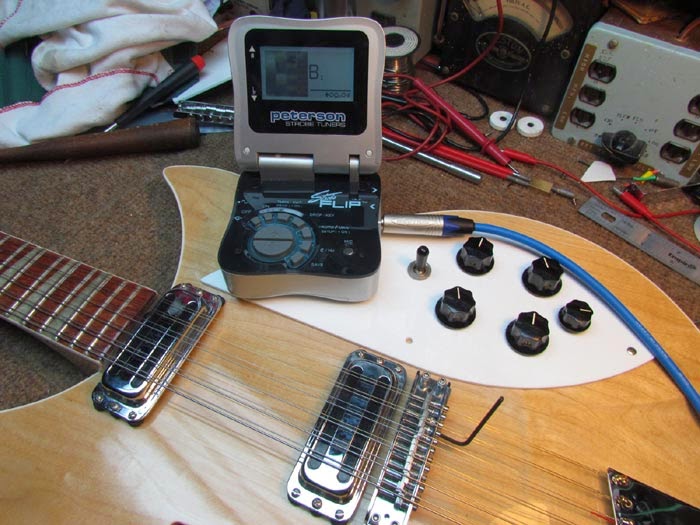
 This is a Rickenbacker 360/12C63. This is a reissue of "the model George Harrison made so famous," as the Rickenbacker site says.
George's guitar was Fireglo - the well-known sunburst seen on quite a few Rics. This one is in natural, or 'Mapleglo' finish. It was made in January of 2000 - a millenium guitar!
I'm going to change out the stock 6-saddle bridge for a 12-saddle version, restring it, and set it up.
 It may be hard to see in this picture, but the guitar has a visible back bow in the neck (red arrow). That, combined with the fact that it's a 12-string and the action is also high at the nut and the saddle, makes it hard to play.
Virtually all Rickenbacker 12-strings have a 6-saddle bridge standard. Only a couple of models, notably the Roger McGuinn model, have 12-saddle bridges out of the box.
There is a lot of discussion about the 6-saddle bridge and intonation. The factory maintains that with proper strings and neck adjustment, a 12-saddle bridge will play in tune.
My experience is that a 12-saddle bridge is key to having exact intonation. It's possible to have a 6-saddle bridge be close, but to be spot on, you have to have a 12-saddle bridge. To be honest, most players might not be picky about the intonation, so a 6-saddle bridge is certainly acceptable. I just prefer having the accuracy of the 12-saddle bridge.
Rickenbacker sells a 12-saddle replacement bridge, and that's what I'm going to install.
It's easy enough to remove the bridge. Just loosen the strings and slide the old one out. I measured the bridge height and set the new bridge to the same measurement. This will change during the setup, but I wanted to have a decent starting point.
Here's the 6-saddle bridge on the left and the new 12-saddle model on the right.
I was talking to Toy Making Dad on the (speaker) phone as I was doing this. I don't think he realized it. We were probably talking about The Walking Dead or something more important anyway.
Here's the part I was a little unsure about.
The bridge saddles need to be slotted. You can see what I did was put the old bridge under the strings to use as a guide for the new bridge. Also see the slots in the old saddles. What we're aiming for is the same string spacing on the new saddles.
I measured the string spacing on the old bridge. What I found is the spacing wasn't consistent, but I had something to work with.
At this point, I could line up the strings with the same spacing as they passed over the new bridge.
Then I scribed marks for the slots with an X-Acto knife.
Here's the bridge with the scribed marks. (You can see them better if you click for the large image).
Now we file the saddles with nut files. As with a nut, use a file appropriate for the string gauge.
You don't need more that a small groove - just about half of the diameter of the string. That translates to just a couple of strokes of the file - a downward slant toward the tailpiece is best. Just enough of a notch to the keep the string seated in place.
Gibson Tune-O-Matics are slotted this way too, by the way.
Last step is to remove any burrs in the slots. I used abrasive cord for this.
Then I put the bridge back on and restring the guitar.
I'm putting on these fantastic Thomastik-Infeld nickel flat wound strings. I've heard nothing but great things about them. Get them from the great folks at Pick of the Ricks in New Joisey.
(The strings are amazing, by the way. They've got that vintage 'chime' tone in spades. I also use Tomastik flatwounds on my acoustic bass and they are incredible).
Then I set the intonation as you normally would. It just takes twice as long as a 6-string!
In the next installment, we'll adjust the neck.


What's the actual distance measurements between the bridge pickup and the saddle, if I may ask? Thank you in advance!
ReplyDelete