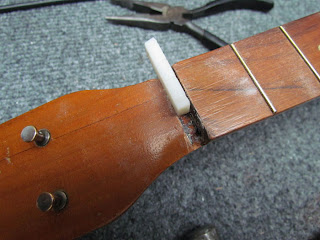
 I'm going to replace the old plastic string nut on the baritone ukulele. I'm almost positive the one on the uke is not the original, since there is so much headstock veneer that's been hacked up.
I score alongside the nut with an X-Acto knife. Usually this would be done to prevent the finish from chipping, but in this case, I want to make sure no glue is stuck to the veneer and will cause chips.
And yes, whoever did this before did not do this step, hence the chips.
Then, using a block of wood, tap the nut on either side. This should break the old glue joint.
Sure enough, it slides right out. Not a very tight fit either.
If you look closely, you'll see a mold mark and the number "6" on the back side of the nut. Either this was a cheap ready-cut replacement, or it was cut from a piece of plastic scrap from some other use.
Here I'm using a chisel to carefully scrape away the old glue from the nut slot. Whoever did this went way overboard. I use just a touch - or even no glue at all - on my builds.
If the nut fits perfectly, the string tension will hold the nut in place. The only reason to use any glue at all is to make sure the nut won't slip laterally.
This would be better with a smaller chisel - just a couple of millimeters. But my smallest (now, anyway) is 1/4 inch.
The arrows point to the big chip I want to fill, as well as some smaller ones.
After scraping the glue, I lightly sanded the nut slot with 220 grit paper. Then I taped off the headstock veneer in preparation for the fill attempt.
On the other end of the ukulele, the old plastic saddle just pulls right out. This was a fairly inexpensive instrument in its day, but the bridge is nicely made of solid wood (I think rosewood), and the saddle is nicely shaped to match it.


0 comments:
Post a Comment