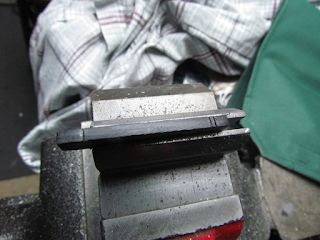
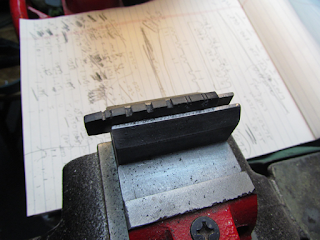
Now we'll make a new one, with different string spacing between the string pairs, to replace it.
This is not a new concept that I dreamed up. (Although I will confess to having the occasional dream about playing guitar.) If you search the interwebs and read guitar forums you'll find complaints and comments about the string spacing on these guitars, or the 'narrow' neck and how it makes it difficult to play cleanly, especially in the lower positions.
There have also been comments about a fix for this - namely, making a new nut with revised spacing.
After pondering all of this information, I wanted to take a stab at making a nut with the spacing between the strings in each pair reduced.
I made some semi-coherent
The one measurement floating around as a suggested spacing seemed to be .070 in. I took that as the widest I'd want to use, potentially, and went from there.
I wanted to space the bass strings wider, and then progressively narrow the spacing down to the high E string pair.
To make it clear which string in a given pair I'm referring to, I'm calling the lower-pitched string of the pair the "fundamental" string, and the higher string the "octave" string. Obviously the B and E pairs are tuned in unison, but that reference will still serve for describing the position of both strings in the pair.
I took into account the string gauges - by using half of a given fundamental string's gauge, along half the width of its accompanying octave string's gauge. Those two amounts added together gave me a width for the string pair. Then I just added the amount each pair should be apart.
This will make more sense in a moment I think. It's not rocket surgery.
I of course had the original nut to take measurements from.
You can see the factory nut on the left, along with the TUSQ blank I would cut the new spacing on.
I also had studied the spacing of the strings while the stock nut was still on the guitar, which gave me an idea of how close the string pairs could be placed together.
I did have some concern that a pair of strings might 'crash' together when played if they were too close. This turned out to be unfounded.
The table below is what I came up with to work from in laying out the new nut. These measurements are in inches; it should be easy to convert them to metric if that's what you're used to working with.
The headings are clear I think. The "Theoretical Spacing" column is the spacing that I calculated to be the smallest amount for the strings, center-to-center for a given pair to be spaced. The "Actual Spacing" column is the amount I used to cut them. (Translation: I was a bit gun-shy and wanted to allow a touch of extra spacing just in case).
And finally, the "Gained in Spacing" column shows the difference between the stock nut and the revised spacing.
| String Pair | Stock Rickenbacker Spacing | Theoretical Spacing | Actual Spacing | Gained in Spacing |
|---|---|---|---|---|
| 6 - E | .0815 | .0700 | .0700 | .0115 |
| 5 - A | .0805 | .0630 | .0650 | .0155 |
| 4 - D | .0760 | .0550 | .0600 | .0160 |
| 3 - G | .0635 | .0520 | .0550 | .0085 |
| 2 - B | .0630 | .0500 | .0500 | .0130 |
| 1 - E | .0530 | .0470 | .0500 | .0030 |
| Total | .0675 |
Of course, these spacing numbers are not all we need to cut the nut. And we'll get even more space by moving the E string pairs out further toward the edge of the fingerboard.
The approach I used was just a variation on the way a standard 6-string nut would be laid out and cut.
Normally, you'd mark the two outside strings first, and then lay out the other 4 strings based on the position of those 2 strings. I use the Stew-Mac string spacing gauge to mark the strings' positions, and that's the process you would normally follow.
However, in this case, my lowest string (12th) is the lowest pitched string, as it would be on a 6-string guitar, but the string that would be the standard high E is NOT the highest string on a 12-string.
So I had to adjust a bit to compensate so that I could use the spacing gauge.
I laid out the low E (12th) string as usual - so it would lay just inside the bevel on the first fret. Then I did the same (seen in the image above) for the first of the high E pair (1st).
Then, I marked the second string (the 'octave' high E, although it's tuned to the same pitch) to have a spacing of .0500 as calculated above.
Now I'll use the far left (low E, fundamental, 12th string) mark and inside (fundamental position) high E to line up as the outside strings for the string spacing gauge.
On the right you can see the markings on the string gauge I used to lay out the remaining fundamental string slots.
The arrows show the marking used for the those strings - note that the mark for the high E pair on the gauge uses the inside mark - so that the rest of the string slots will be correct.
It's harder to explain that it is to do. If you're familiar with using the string spacing gauge, it should make perfect sense. You can't use the outside high E as your marker - the rest of the strings won't be laid out correctly.
So then with the fundamental strings marked, we can now mark the positions of the remaining string pairs using the spacing we calculated above.
This picture shows how the pair spacing was laid out with a digital caliper. Obviously, we're working with thousandths of an inch, so of the spacing as cut wound up close, but probably not exactly down to that accuracy.
But it's as close as I could make it.
I stuck this picture in here to show how I held the nut in place as I was working on it. There isn't a groove in the Rickenbacker headstock to hold the nut in place, so I put a clamp behind it as needed.
I tried to cut the slots into the TUSQ blank.
You can see the result. When I tried to get the slot pairs down to the proper depth, the material that is "precision engineered under high pressure and heat" pretty much just crumbled, so instead of two slots, I had one really big one.
The TUSQ also felt pretty soft, like plastic, as I worked it with my nut files.
So I'm not sure what to think at this point. I'm disappointed, because I wanted to try TUSQ. But it didn't work for me on this 12-string nut.
I do have another piece of their nut material and I'll try it on a standard 6-string guitar.
I see that Taylor Guitars uses TUSQ "on all of our guitars" according to Bob Taylor. Maybe they have their 12-string nuts molded so they don't have to cut the slots?
What is TUSQ really? It sure isn't clear from their website other than it "...delivers a rich tone, crystal clear bell like high end with big open lows and a significant increase in harmonic content and harmonic sustain. Increased harmonics equals more richness and character in your tone. Its [sic] the difference between a four piece choir and a twelve piece choir singing every time your [sic] play a note."
Which, if true, is even more of a bummer that I can't make a 12-string nut out of it.
Anyway, I had a plan B in hand.
In case I made a major goof with the TUSQ, I had procured a few pieces of Buffalo horn from David Warther at Guitar Parts and More. I wanted a black nut with the factory look, so Buffalo was it.
Using the Buffalo horn is just like working with cow bone. (Moooooooo).
Cut it to size.
Note the small notch on the bottom to clear the truss rods.
Lay out the string pairs as described above, and shape the top.
In this shot, I still need to trim the edges, but the nut is close to being ready.
Then polish as usual. The white marks are polishing compound, I got most of it out later.
Here's the Buffalo bone nut polished and ready to install. I started with 600 grit paper, went up to 12000, then used a swirl remover compound fo the final shine.
Looks good I think.
For comparison, here's the stock nut. Note especially the G, B and E pairs are spaced. We know from the measurements that there is some progressive spacing, but to the naked eye, the pairs look like the spacing is almost the same.
And the E pairs are further in from the fretboard edge than the new nut below.
And this is the spacing on the new nut.
The E pairs are moved out, which opened up more space for the other strings.. The D, G, B, and E pairs are noticeably closer together.
You'll see where (I admit it) I could have gotten the A (especially), D and G pairs even closer together. I didn't have a good idea of how well it would work until it was strung to pitch.
Next time, I will be able to improve on this. But as Toy Making Dad would say, this was a proof of concept.
So the real question is how does it play?
It's remarkable. Just a few thousandths here and there makes a huge difference. In an open C chord, for example, the G and D strings don't get muted by the 2nd finger as they did before. It's really nice.
Now I want to try making another one and refine this a bit more...but clearly this solves the string spacing problem!


Are you selling these 12 string ricky nuts yet?
ReplyDeleteAre these ricky 12 string nuts available for purchase?
ReplyDeletevanremog@aol.com
I don't have any plans to sell them! Ideally they should be customized for each guitar and for a given gauge of strings. That's why I went into so much detail...so people could make their own.
ReplyDeleteI just bought one from these guys. Came to USA in less than 1 week. All I had to do is sand down the bottom side to get the height. The notches are for .042 - .010 set they sell. I used ricstrings and work OK. Amazing difference in playability, fingering chords without muting strings.
ReplyDeletehttps://www.rickysounds.co.uk/product-category/nuts/