For a long time (years) I've wanted to try making a printed circuit board (PCB). Now, don't get me wrong, I am still Point-to-Point Wired Boy at heart, but I've seen all these way cool circuits on the interweb and the best way to make them is with a PCB. You can do them on vero board (see my White Pepper Fuzz), but it's a lot neater and easier to use a PCB.
So I have armed myself with the necessary ingredients and fired up the workbench.
First, of course, I needed a layout. Now, I could have just used an existing layout, but what fun would that be? In reading about Fuzz Faces, I was curious to try making one with some extra twists. And, naturally, I had to use some of the 'new' AC 128 PNP germanium transistors I just procured from Germany.
So I took a basic Fuzz Face layout and added my own bits. I cooked it up in Photoshop, since I'm pretty proficient with it. Next time I may try Eagle or some other software.
The basic process is: print the layout onto PCB film, then transfer the layout from the film to a copper-clad circuit board. Then remove the copper from the board by etching it chemically. The film (called a 'resist') prevents the copper on the layout (the circuit traces) from being removed. Then the resist is taken off with acetone, and the board is drilled.
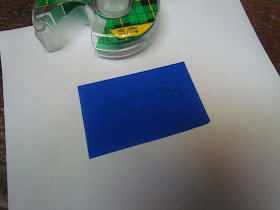
I used a commercial PCB film called "Press-n-Peel" made by Techniks. I printed the layout on a piece of plain paper using a laser printer. Then I took that print and taped a piece of Press-n-Peel over the layout, and ran the sheet through the printer again.
What you wind up with is the layout printed onto the Press-n-Peel sheet. Pretty cool. My printer mangled the sheet a bit, but the print was nice and clear.
Then you gently remove the sheet from the paper.
You'll notice I printed the layout backward, since it will be reversed on the final board. This will become clearer a bit later.
Next, we prepare the circuit board. I used an X-Acto knife to score the board. My intention was to score it, and then place it in a vise and snap it off. I tried this, but I had a heck of a time generating enough force to snap it off, so I wound up using my trusty X-Acto razor saw to cut it.
You could also use a small hacksaw or a Dremel tool as well.
After the board is cut to the correct size, clean it with a cleaning pad (Scotchbrite type) and some scouring powder (I used Bon Ami). The copper will be nice and shiny. From this point on, wear gloves when handling the board so you don't get fingerprints on it.
Take the Press-n-Peel with the layout on it, and trim it to the desired size.
Now ze real fun begins!
Place the Press-n-Peel on the copper board with the printed side down. Heat an iron on a lowish setting - the recommended setting is one for polyester. On my old Black & Decker iron, this is #3.
Place a sheet of clean paper over the film and board carefully so it won't shift. Then iron the board. I did mine for about 4 minutes, and it was probably a bit too long. Then let the board cool for about 5 minutes.
The moment of truth!
Carefully peel back the film. You should have a transferred layout. My lettering is a tad blurry, and according to what I've read on the interweb, that usually means it was heated too long. Next time I'll do better.
However, I do have a layout that I can use!


No comments:
Post a Comment