Things are starting to turn from the destruction mode to the reassembly mode on the Dynaco PAS rebuild. Soon ve shall hear the fine tube tone once again!
I keep a handful of old toothbrushes on the workbench for cleaning parts. A lot of the radios I work on have 50, 60, 70 years of grime on them so the toothbrushes usually wind up being used the clean radio chassis. For that kind of cleaning I usually use Simple Green at full strength. That stuff really rocks - you can mix it to different strength and it's biodegradable. At full strength, it's a good cleaner, not super potent, which is perfect for my use. It also doesn't have a chemical smell, which is nice.
I did a run of Simple Green on the input jacks, then I used Deoxit. That's what I'm scrubbing with in the first picture. After the Deoxit, I took after the jacks with Noxon 7. This is a metal polish similar to Brasso, but I like it better. There has been a lot of discussion on the Antique Radio Forms (see my links) about Brasso and how the formula has apparently changed for the worse. Maybe that's why I favor Noxon. Not sure where I even got the stuff...I need to get more.
For the Noxon treatment, I used Q-tips and brother, was it a pain. I don't have any polishing pads for my Dremel, otherwise I would have tried that. I didn't get the contacts totally clean, but they are like 85% better than they were.
After I did the outside (actually the ground connection) on the RCA jacks, I doused a Q-tip with Deoxit and used it to clean the inside connector (the hot side). I wound up tearing off some of the cotton on the end of the Q-tip so I could jam it in the connector as you see.
It also took more than one Q-tip to do this, but they came out dirty each time, so that's a good thing.
After that, I sprayed a bit more Deoxit into the connector and insert a phono plug into each one and turned it a bit. I'm pretty confident the connectors are cleaned up well. Since all of our signal goes through them, we need to ensure they are clean, yes?
The contacts are pretty shiny now.
I also took some of the Mother's aluminum polish to the back panel. It was much dirtier than the inside (no surprise there...). It looks better, but it's not perfect. I got worn out and didn't want to spend another 2 hours going at it.
The connectors look like little smokestacks, don't they?
Now we (finally) get to start Putting Stuff Into The Chassis.
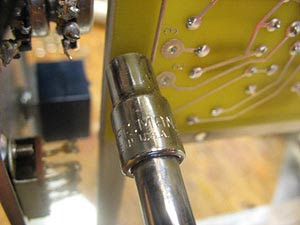
I take out my trusty 1/4 inch Craftsman socket and have at bolting the new PC boards into place. They go under the chassis, not over it.
Here we have the new boards in place.
I have a handful of components - coupling caps - to replace on both boards but I decided to wait until the chassis is mostly wired up to put them in. It will become clearer later why I'm waiting.


No comments:
Post a Comment