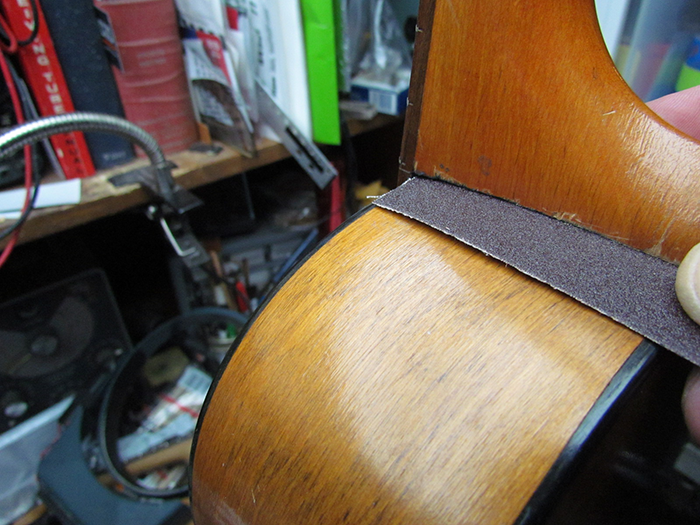
 In the last post I mentioned that I'll clean up the gap in the joint between the neck heel and the body of the guitar.
The way to do this is with a narrow piece of sandpaper. In the past, I've cut strips from a regular sheet of paper. Which works fine, but the paper tears easily. So this time I'm using cloth-backed 120 grit paper, which is pretty tough and doesn't tear.
Hold the neck down to the guitar and pull the paper through. It really just takes a few pulls and the heel will assume the shape of the body.
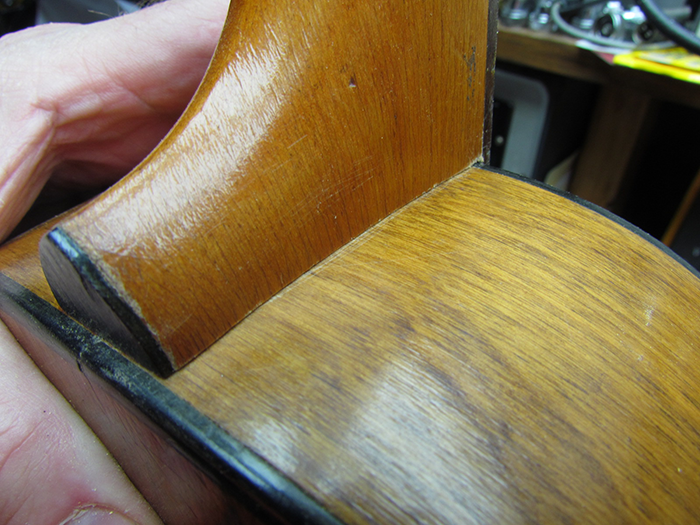
The other side looks the same.

I restrung the guitar and brought it up to pitch - in this case it's CGDA tenor tuning.
The dovetail will stay in place so you can tune the guitar. If you whack the joint, yes, it will come apart.

I probably could have left it, but I went ahead and took a touch (.011") off the heel so it lined up perfectly.
I forgot to take pictures of the re-re-test. Sorry.

I scraped the surface under the fingerboard extension to get a 'fresh' wood surface for the glue to adhere to, and I did the same on the guitar body where the extension will be glued down.


Just a regular heat gun pointed at the dovetail and fingerboard extension area enough to warm them up and give a little more working time for the hide glue. The glue is heated to about 140°F (60°C), and begins to gel at about 90°F (32.2°C), so we have a couple minutes maximum to work with.


I had all of my cauls and clamps ready to go. I do a dry run without glue so I can get the clamps adjusted closely to where they'll need to be to save time once the glue is applied.

Then a bar clamp on that same fingerboard caul and a third caul under the heel/body joint.
There is some glue-squeeze out of the fingerboard-to-body joint, and I get most of that cleaned up now before it sets. Just wipe off the excess with a damp towel.
Gluing Acoustic Guitar Neck To Body - Regal Tenor Neck Reset Continues
ReplyDeleteCrawls Backward (When Alarmed) >>>>> Download Now
>>>>> Download Full
Gluing Acoustic Guitar Neck To Body - Regal Tenor Neck Reset Continues
Crawls Backward (When Alarmed) >>>>> Download LINK
>>>>> Download Now
Gluing Acoustic Guitar Neck To Body - Regal Tenor Neck Reset Continues
Crawls Backward (When Alarmed) >>>>> Download Full
>>>>> Download LINK